Face Swap AI tools are indeed a lot of fun.
The ability to swap faces is a fun way to create a meme to share on Social Media.
A free Python package may be used to perform this task on Linux or Windows.
Download the installation script here: https://github.com/deepfakes/faceswap/releases/latest/download/faceswap_setup_x64.sh.
(jcartwright@2403-4800-25af-b00--2) 192.168.1.5 USB  $ bash faceswap_setup_x64.sh
                         001
                        11 10  010
               @@@@      10
            @@@@@@@@         00     1
          @@@@@@@@@@  1  1            0
        @@@@@@@@    0000 01111
       @@@@@@@@@@    01  110 01  1
      @@@@@@@@@@@@ 111    010    0
      @@@@@@@@@@@@@@@@  10    0
      @@@@@@@@@@@@@   0010   1
      @@@@@@@@@  @@@   100         1
      @@@@@@@ .@@@@  10       1
       #@@@@@@@@@@@  001       0
         @@@@@@@@@@@  ,
         @@@@@@@@  @@@@@
        @@@@@@@@ @@@@@@@@
       @@@@@@@@@,@@@@@@@@  / _|
       %@@@@@@@@@@@@@@@@@ | |_  ___
           @@@@@@@@@@@@@@ |  _|/ __|
            @@@@@@@@@@@@  | |  \__ \
             @@@@@@@@@@(  |_|  |___/
                @@@@@@
                 @@@@

================ Welcome to the Linux Faceswap Installer ================
INFO    To get setup we need to gather some information about where you
INFO    would like Faceswap and Conda to be installed.
INFO    To accept the default values just hit the 'ENTER' key for each
INFO    option. You will have an opportunity to review your responses prior
INFO    to commencing the install.

INFO    IMPORTANT: Make sure that the user 'jcartwright' has
INFO    full permissions for all of the destinations that you select.
Press 'ENTER' to continue with the setup...

================================= CONDA =================================
INFO    Faceswap uses Conda as it handles the installation of all
INFO    prerequisites.
INFO    If you have an existing Conda install then enter the location here,
INFO    otherwise Miniconda3 will be installed in the given location.
Please specify a location for Conda. [default: '/home/jcartwright/miniconda3']:
INFO    The Conda executable can be added to your PATH. This makes it easier
INFO    to run Conda commands directly. If you already have a pre-existing
INFO    Conda install then you should probably not enable this, otherwise
INFO    this should be fine.
Add Conda executable to path? [YES/no]:

INFO    Faceswap will be installed inside a Conda Environment. If an
INFO    environment already exists with the name specified then it will
INFO    be deleted.
Please specify a name for the Faceswap Conda Environmnet [default: 'faceswap']:

================================ FACESWAP ================================
INFO    Faceswap will be installed in the given location. If a folder exists
INFO    at the location you specify, then it will be deleted.
Please specify a location for Faceswap [default: '/home/jcartwright/faceswap']:

INFO    Faceswap can be run on NVIDIA or AMD GPUs or on CPU. You should make
INFO    sure that you have the latest graphics card drivers installed from
INFO    the relevant vendor. Please select the version of Faceswap you wish
INFO    to install.
Select:	1: NVIDIA
	2: AMD (ROCm)
	3: CPU
[default: 1]: 1
This will perform the whole installation in one go.
Once this is finished, run the faceswap_gui_launcher.sh file to load the Python GUI.
(jcartwright@2403-4800-25af-b00--2) 192.168.1.5 faceswap $ ./faceswap_gui_launcher.sh Setting Faceswap backend to NVIDIA 04/27/2024 16:36:37 INFO Log level set to: INFO 04/27/2024 16:36:43 INFO generated new fontManager 04/27/2024 16:36:45 INFO Updating config at: '/home/jcartwright/faceswap/config/gui.ini' |
Please select the proper options when setting up the environment.
================ Welcome to the Linux Faceswap Installer ================ INFO To get setup we need to gather some information about where you INFO would like Faceswap and Conda to be installed. INFO To accept the default values just hit the 'ENTER' key for each INFO option. You will have an opportunity to review your responses prior INFO to commencing the install. INFO IMPORTANT: Make sure that the user 'jcartwright' has INFO full permissions for all of the destinations that you select. Press 'ENTER' to continue with the setup... ================================= CONDA ================================= INFO Faceswap uses Conda as it handles the installation of all INFO prerequisites. INFO If you have an existing Conda install then enter the location here, INFO otherwise Miniconda3 will be installed in the given location. Please specify a location for Conda. [default: '/home/jcartwright/miniconda3']: INFO The Conda executable can be added to your PATH. This makes it easier INFO to run Conda commands directly. If you already have a pre-existing INFO Conda install then you should probably not enable this, otherwise INFO this should be fine. Add Conda executable to path? [YES/no]: INFO Faceswap will be installed inside a Conda Environment. If an INFO environment already exists with the name specified then it will INFO be deleted. Please specify a name for the Faceswap Conda Environmnet [default: 'faceswap']: |
Please select the appropriate Video card you have. Using the CPU is not recommended at all.
================================ FACESWAP ================================ INFO Faceswap will be installed in the given location. If a folder exists INFO at the location you specify, then it will be deleted. Please specify a location for Faceswap [default: '/home/jcartwright/faceswap']: INFO Faceswap can be run on NVIDIA or AMD GPUs or on CPU. You should make INFO sure that you have the latest graphics card drivers installed from INFO the relevant vendor. Please select the version of Faceswap you wish INFO to install. Select: 1: NVIDIA 2: AMD (ROCm) 3: CPU [default: 1]: 1 |
Then finalize the settings before we begin the installation.
======================= POST INSTALLATION ACTIONS ======================= INFO Launching Faceswap requires activating your Conda Environment and INFO then running Faceswap. The installer can simplify this by creating INFO a desktop shortcut to launch straight into the Faceswap GUI Create Desktop Shortcut? [YES/no]: YES ========================= Review install options ========================= INFO Please review the selected installation options before proceeding: - MiniConda3 will be installed in '/home/jcartwright/miniconda3' - MiniConda3 will be added to your PATH - Conda Environment 'faceswap' will be created. - Faceswap will be installed in '/home/jcartwright/faceswap' - Installing for 'nvidia' - A Desktop shortcut will be created Do you wish to continue? [yes/NO]: yes |
Once all of this is done, the installed will download all required packages from the Internet and the Python package will be set up. Then you may begin the long process of beginning the training of the model.
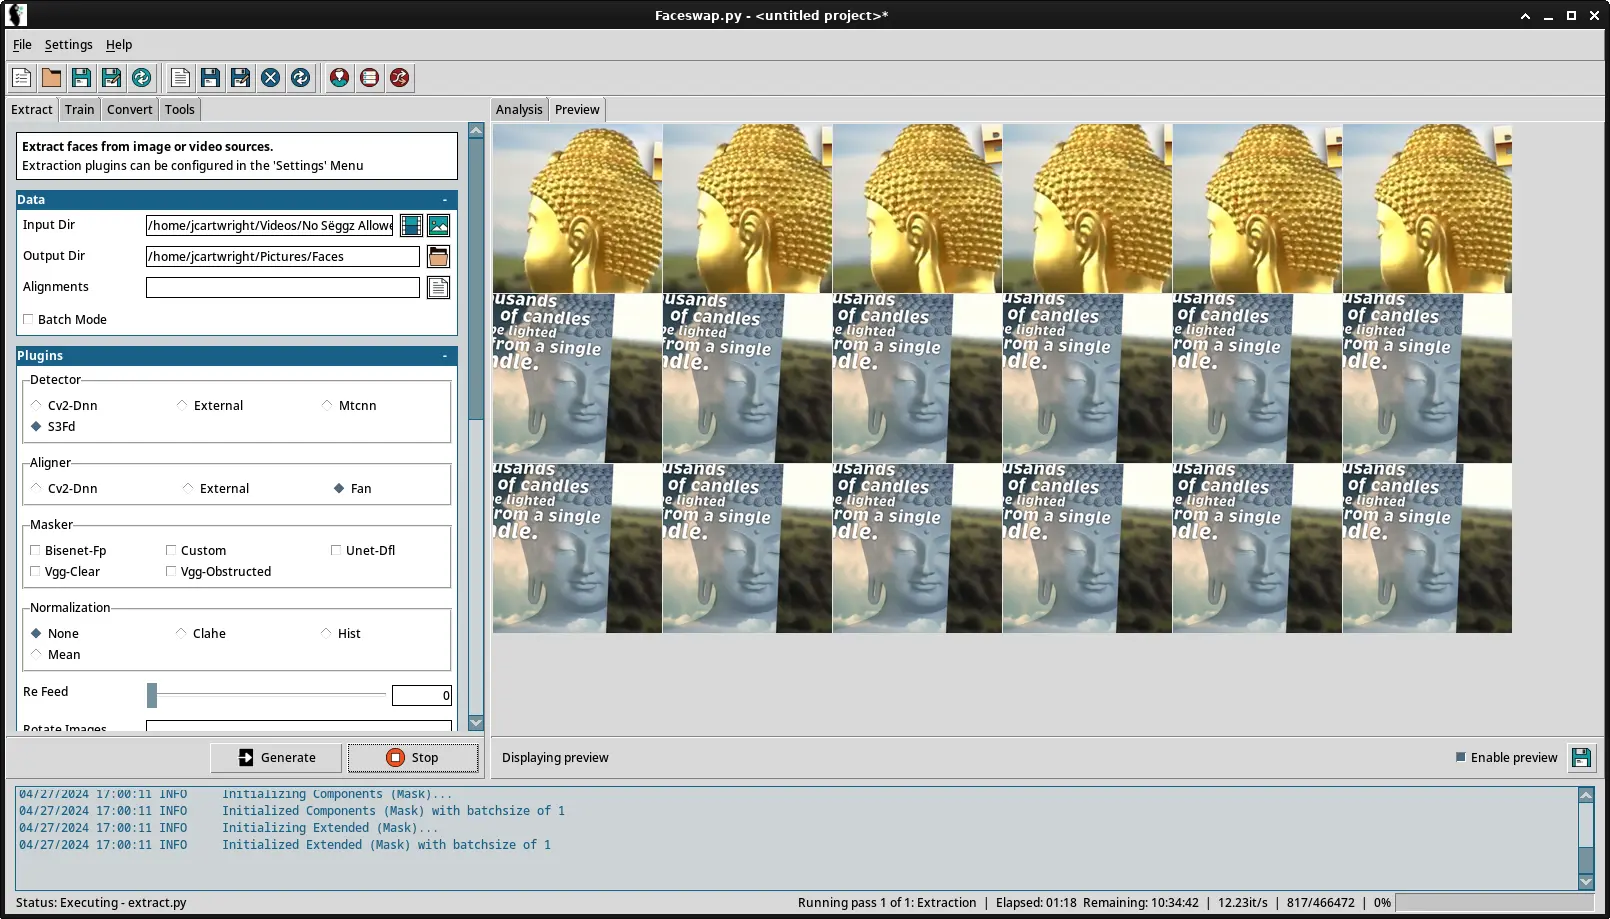
I chose to extract faces from a video file, this was a nice way to get a selection of faces from multiple angles, this is the hard part of training the AI, you need a face viewed from multiple angles to train the AI properly and using a video from YouTube is one way of doing this.
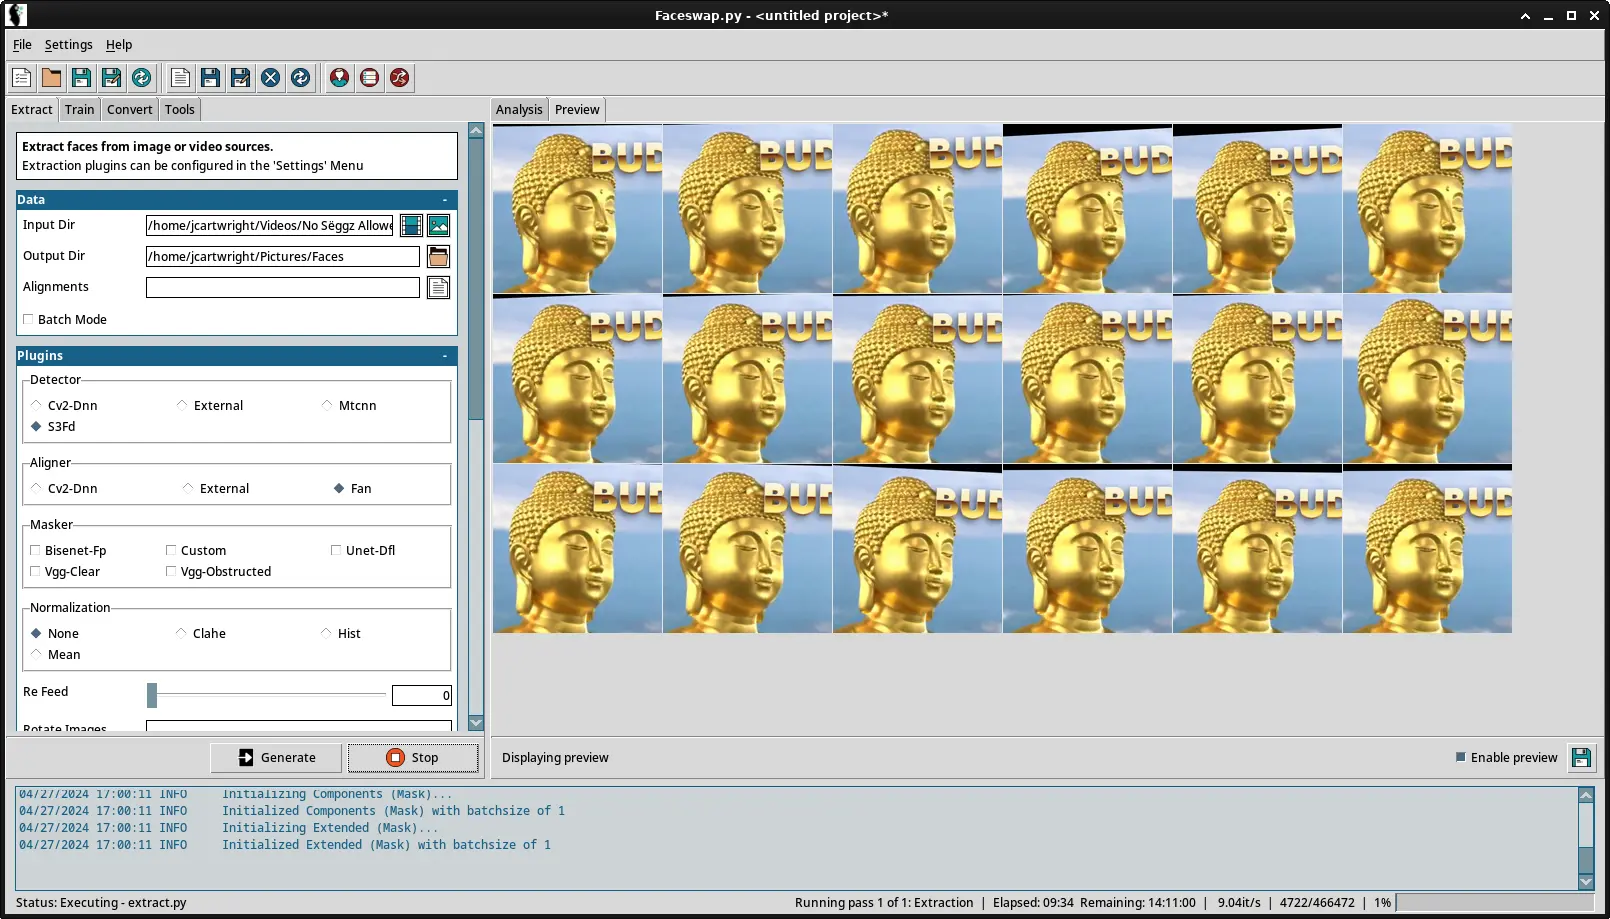
This might take 24 hours, so this might be something that you would start in the morning and leave running all day. But this is one way to get faces for training data. This is a simple to set up model and should not be hard to use once all training data has been collected. It will just take many hours to run.